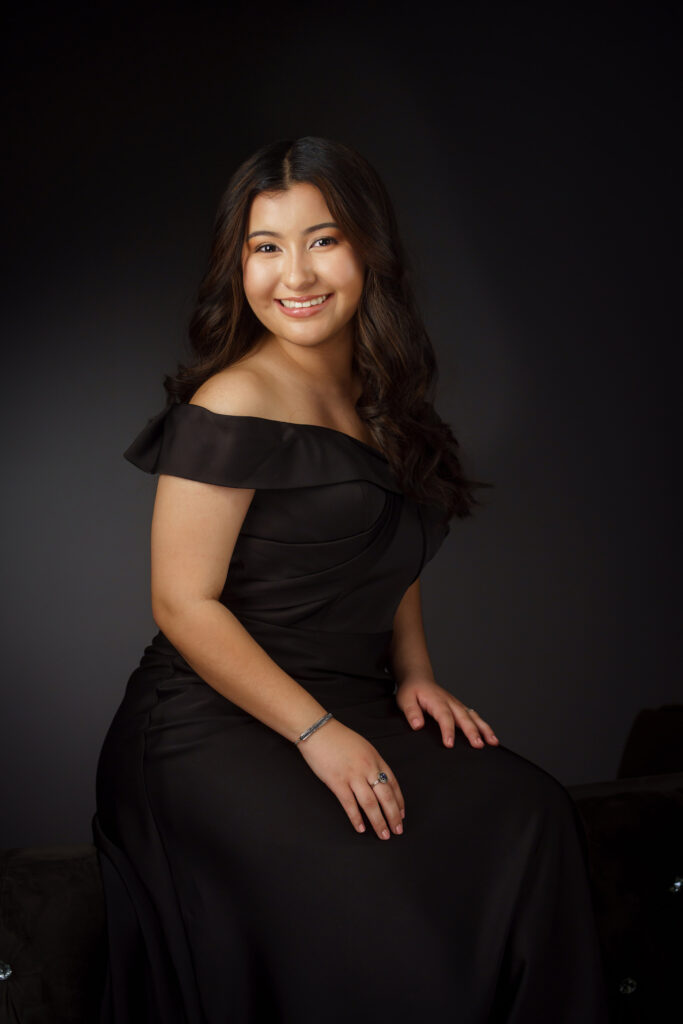
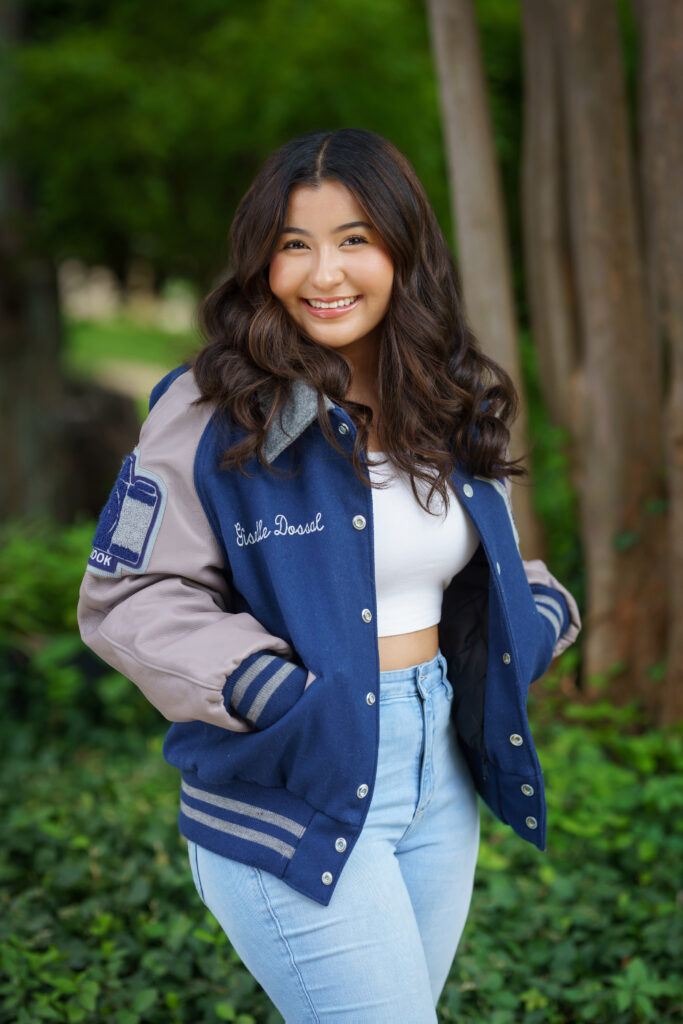
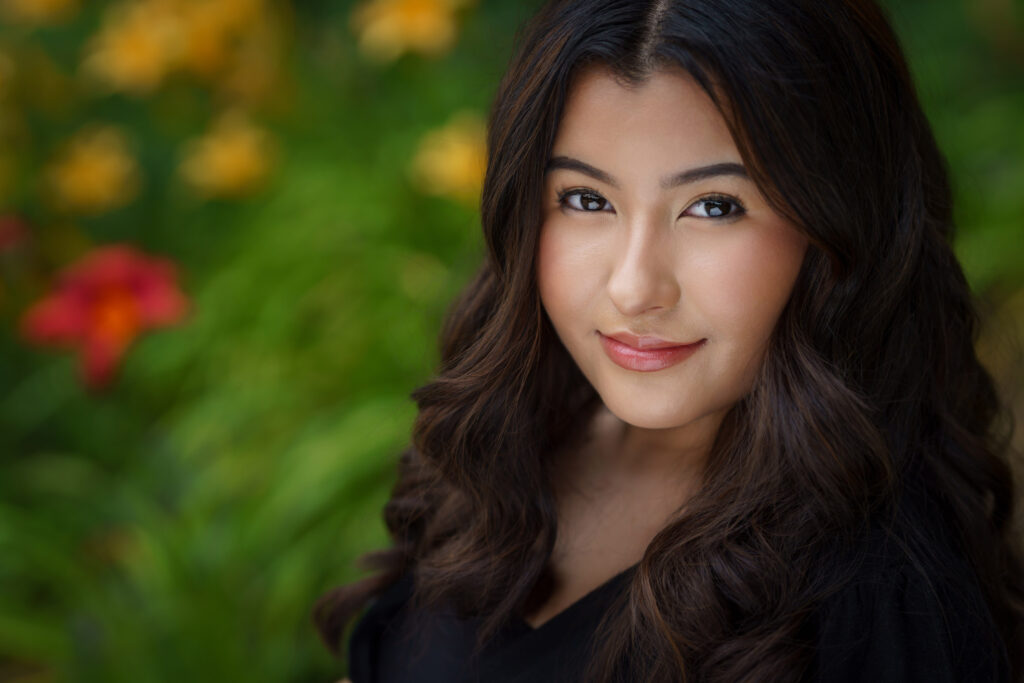
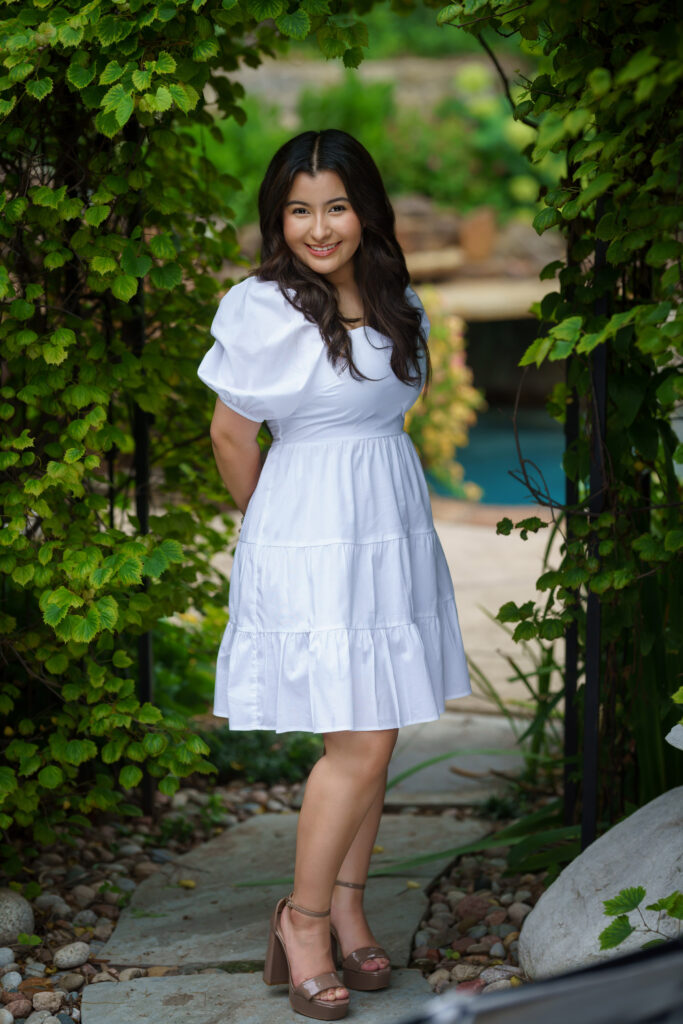
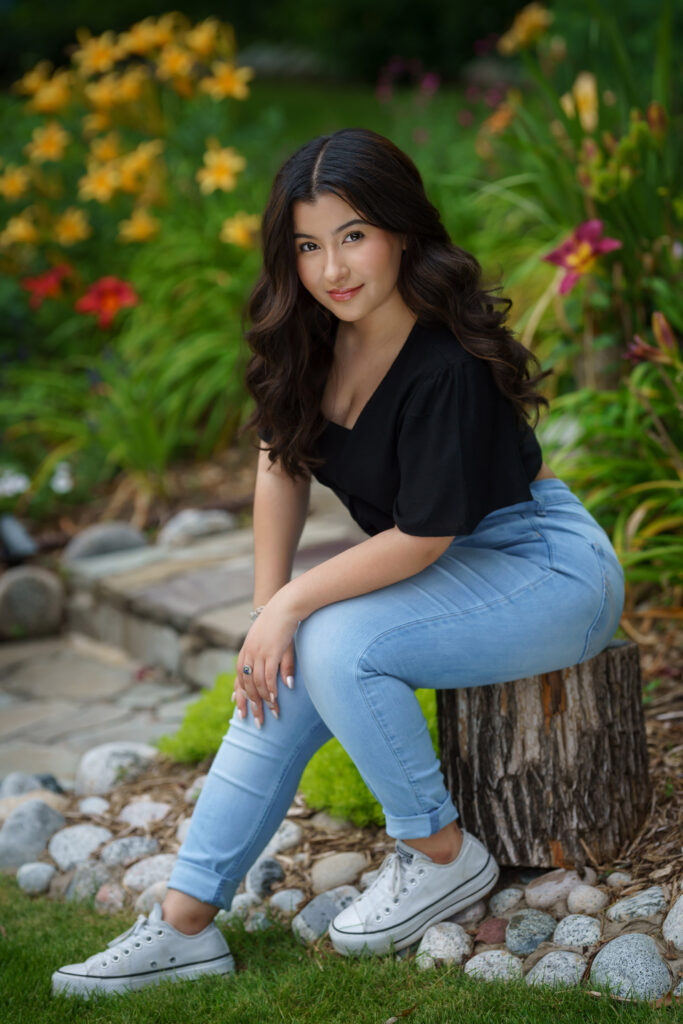
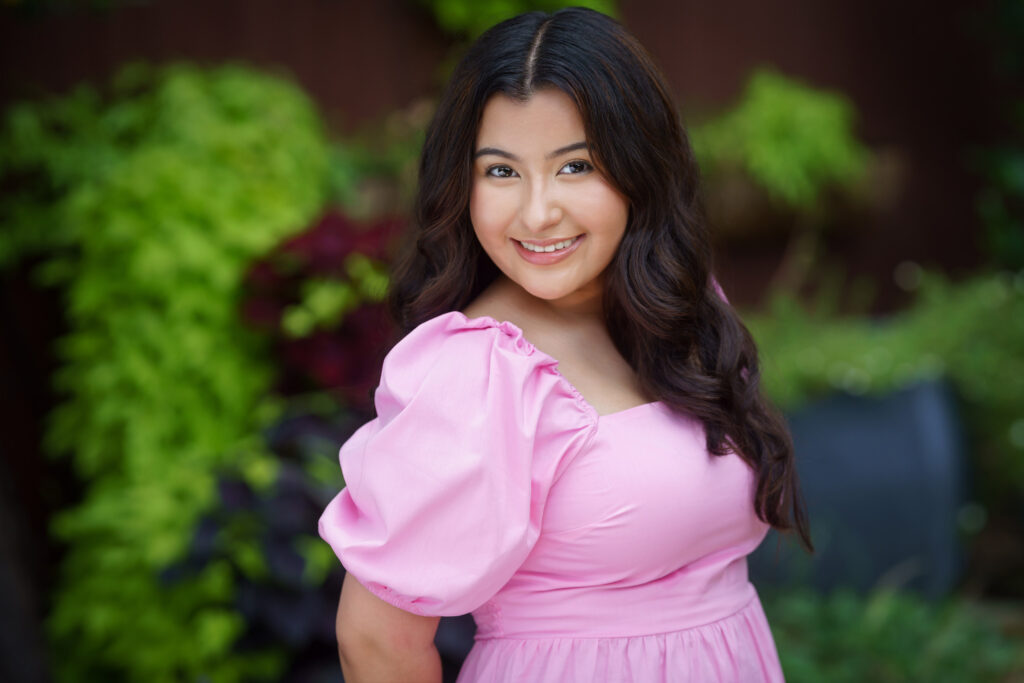
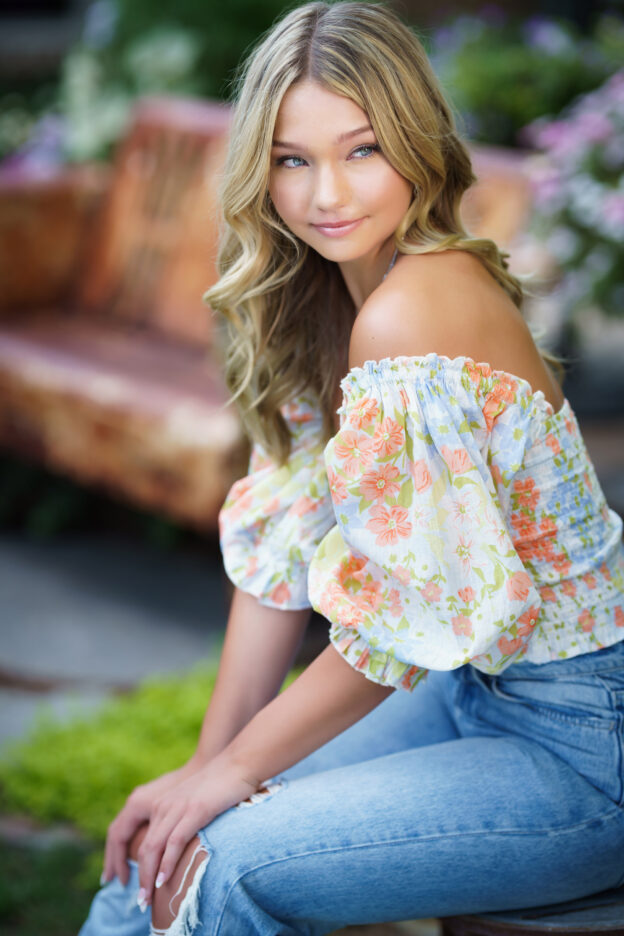
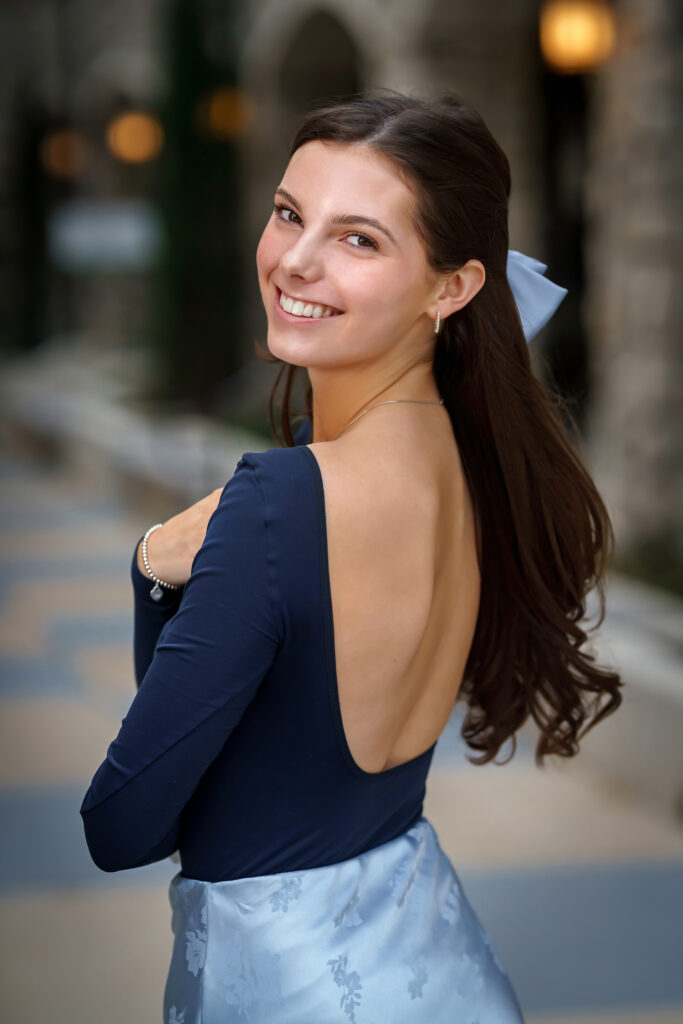
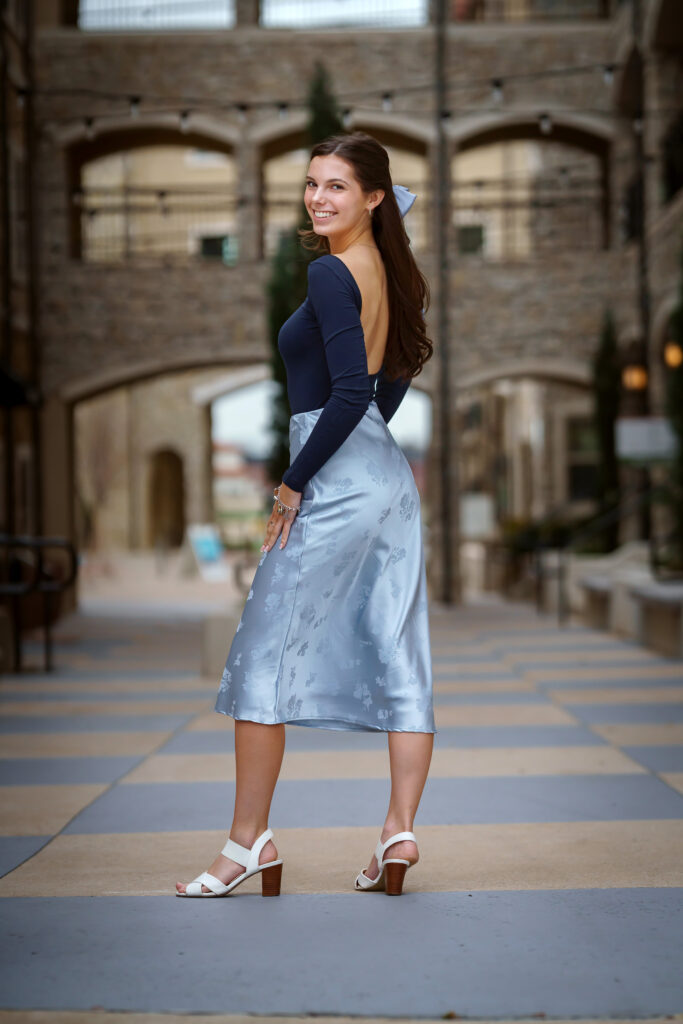
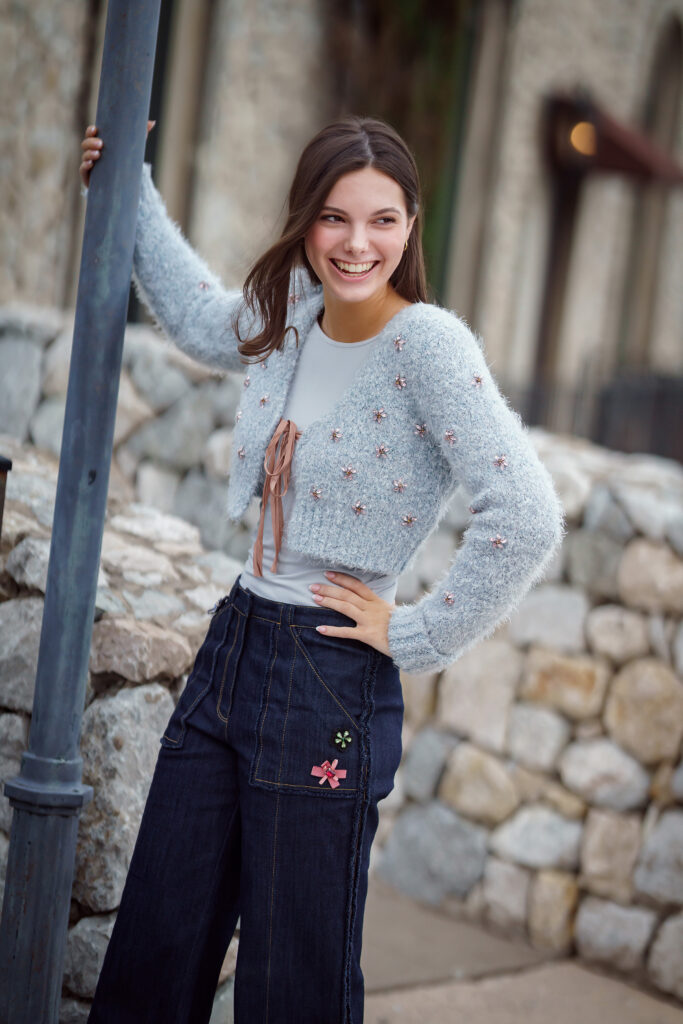
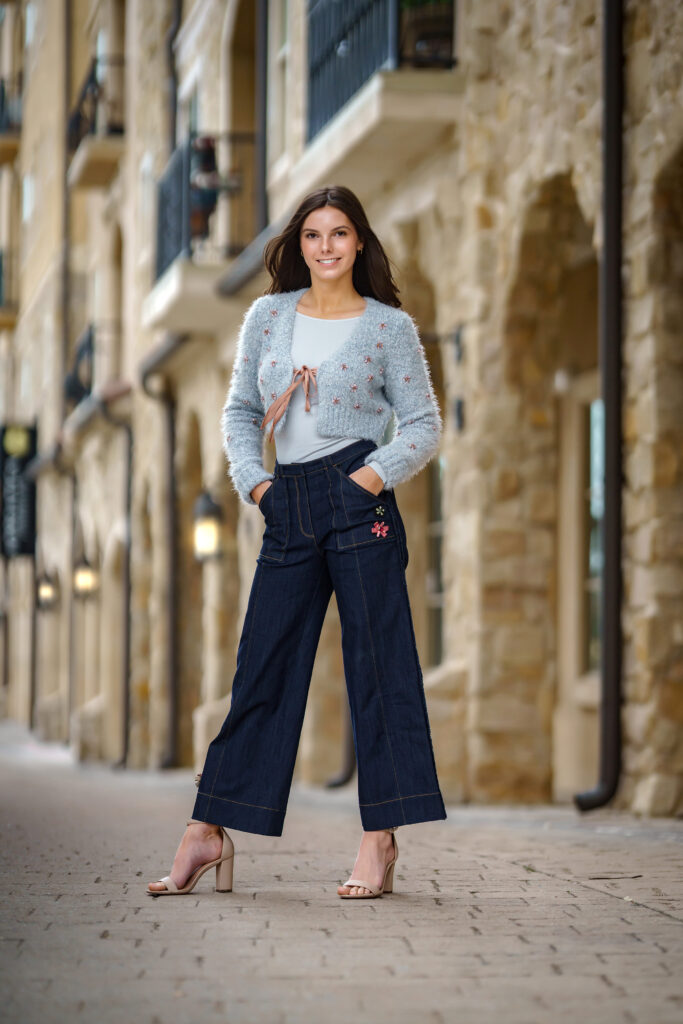
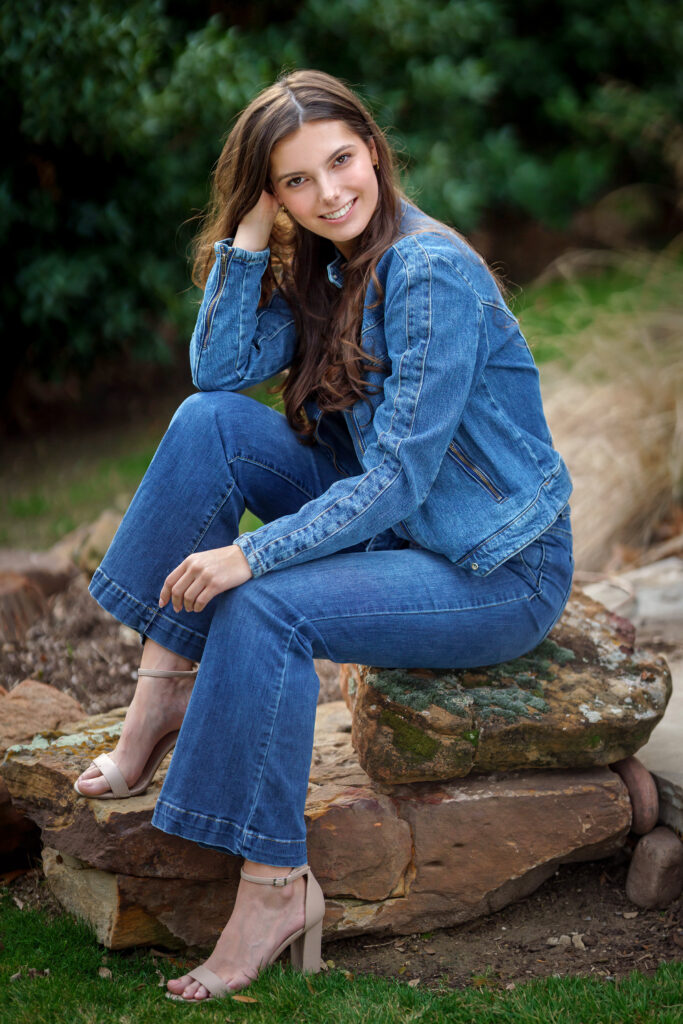
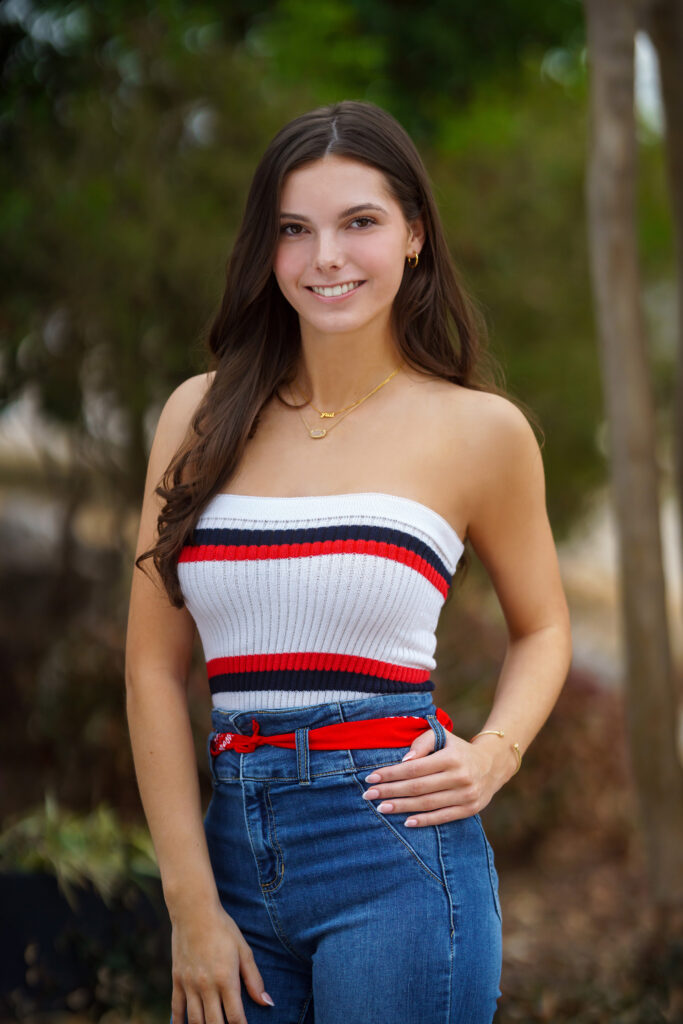
We had such a great time capturing Giselle’s senior portraits! She timed the session perfectly in late spring/early summer because the weather and natural backgrounds were absolutely stunning. We were able to do both classic indoor portraits and gorgeous outdoor photos. She was fun to work with and very photogenic!
Here is a small sample of a few of the portraits we took of this wonderful senior!
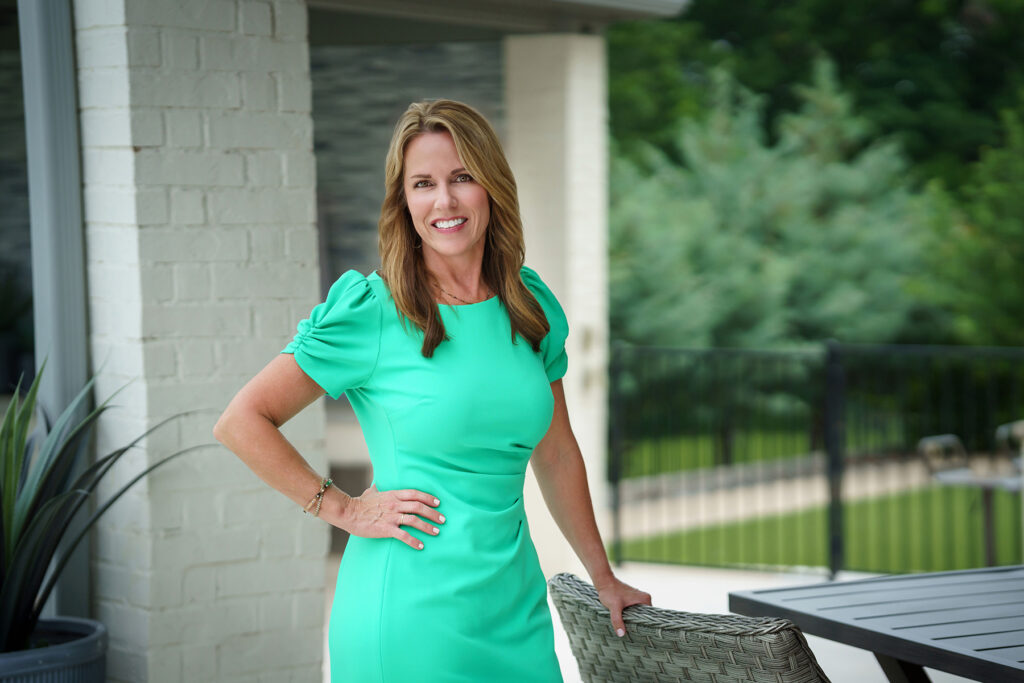
Innovative Images specializes in quality headshots. Realtors make up a vast majority of the headshots we do. Many realtors choose to do a traditional, in studio look that is very versatile and timeless. We love that look!
Another style of realtor photos that is popular is home location shoots. Normally, the realtor finds a model home and gets permission to use it for the session. We come to the home and find the perfect angles, settings, lighting, etc. and shoot a variety of poses. Since realtors sell homes, it makes perfect sense to use a home environment for the background. It looks best to blend the clothing to the colors within the home.
In addition to individual headshots, we do real estate teams in model home settings. The results of this fresh approach look terrific in magazine ads and websites! Take a look at some of our samples on our website of team photography @ https://innovativeimagesphotos.com/team-branding
For the past twenty years or so, most families desire their family portraits to be taken outdoors in nature for a natural, casual style that look great on display on the walls of their homes. We agree that this is a stunning look that will be popular forever.
In the 70’s, 80’s and before, families went to their local photography studio similar to Olan Mills, and did their family portraits inside a studio on a painted background. Most families dressed in their “Sunday best” with no regard for blending with one another. It’s easy to spot one of these portraits and often they are pretty funny. I’m sure you have some of these gems in your attic or on the walls at Grandma’s house.
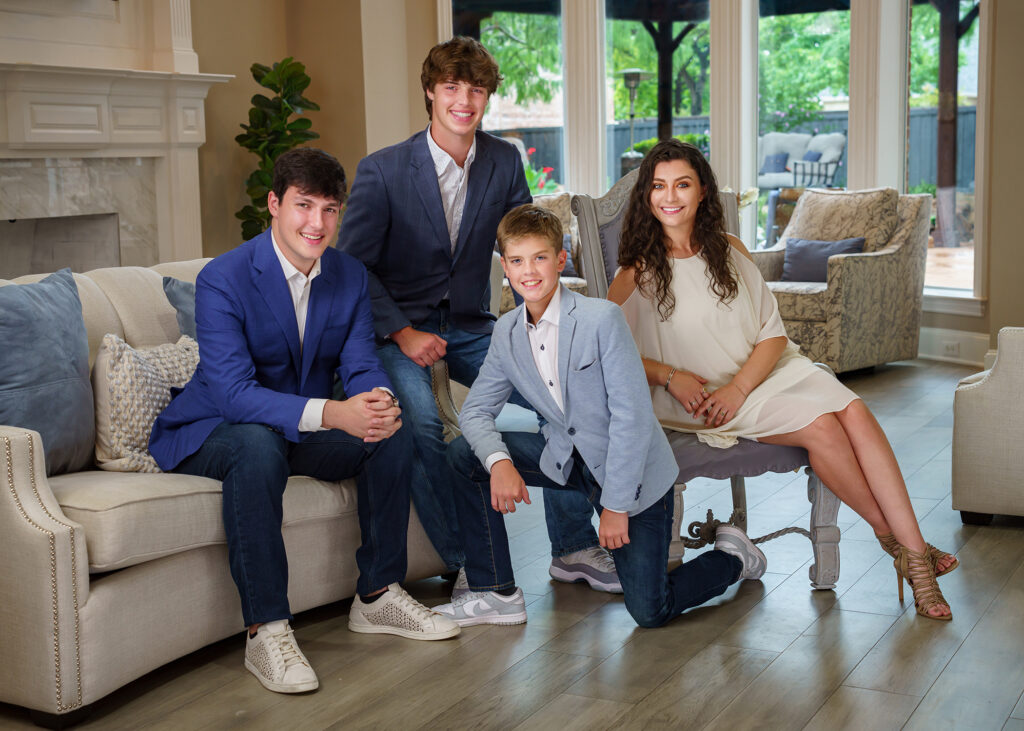
Today, there is a healthy blend of many types of family portrait locations both indoors and outdoors. There are some indoor studio family portraits (although these are few and far between because there aren’t many photo studios with adequate space and photographers who understand indoor lighting.) We still do this type of photography and the results can be absolutely stunning. Another style of indoor family portraits is the location session inside the client’s home. This can be a wonderful idea because it documents the family’s life inside their own setting therefore the results looks incredible on display in gorgeous family portraits on their walls. Another advantage is there is no weather to deal with so hair and light is always great. Many clients have said there is no good spot in their home. Some are surprised to see that an experienced photographer can look for angles and areas that photography beautifully!
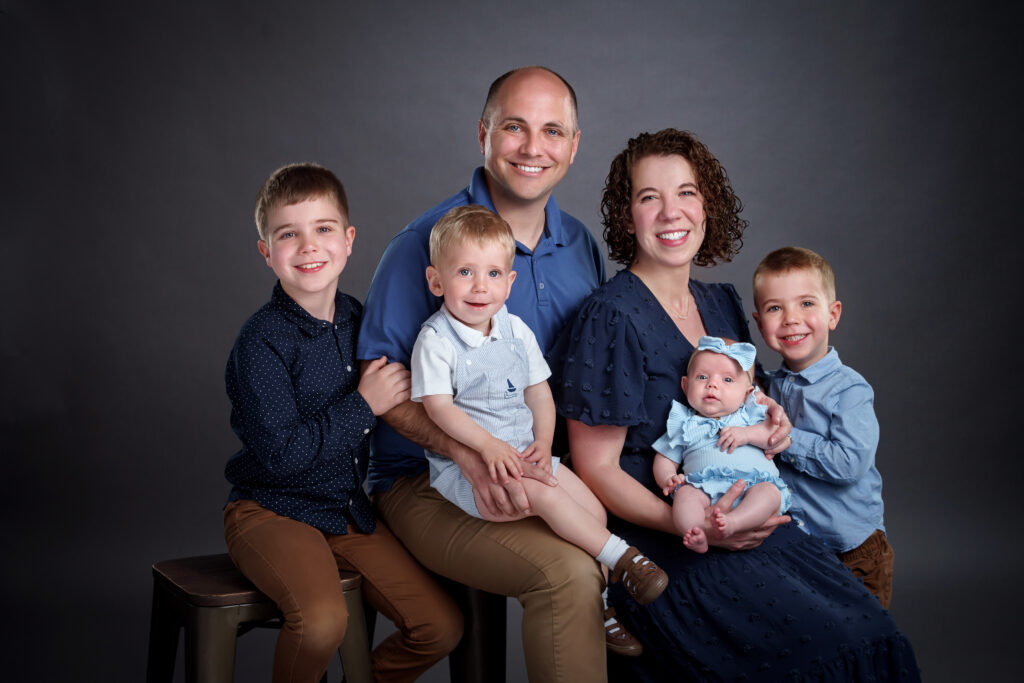
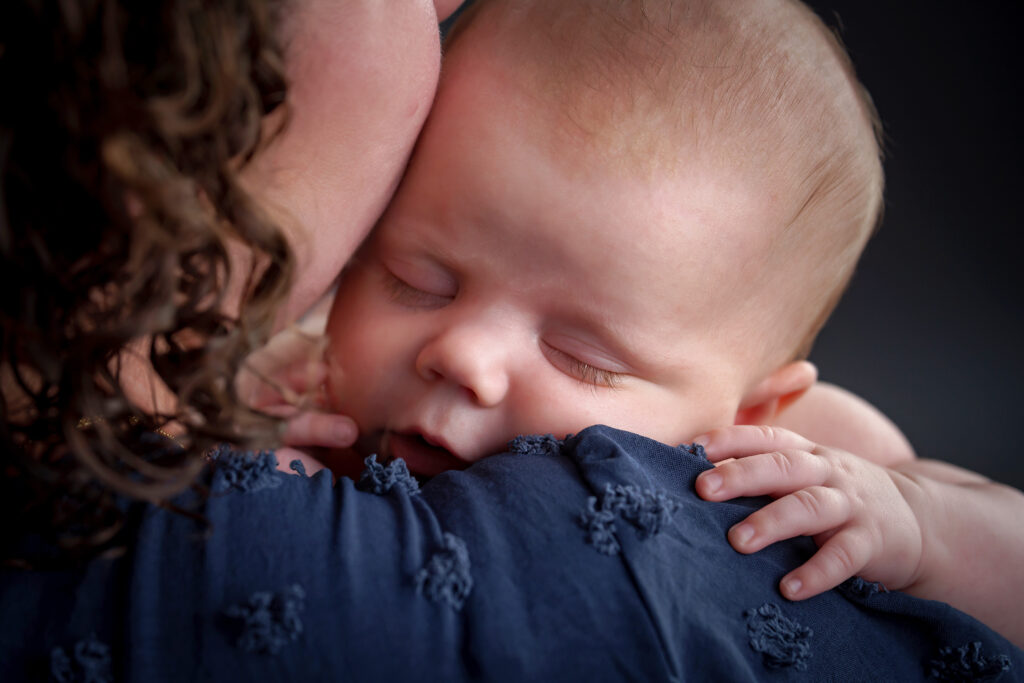
We absolutely love outdoor photos but indoor family portraits have their advantages. If it’s time for your next family portrait and you want to do something different this time, we suggest an indoor session. Take a look at this recent session at the client’s home. We love the windows providing exquisite lighting and the clothing which blends with their decor.
Creating a gallery wall in your apartment is a wonderful way to infuse your space with personality, style, and visual interest. This versatile design element allows you to showcase your favorite artworks, photographs, and treasured items, turning a simple wall into a captivating focal point. In this ApartmentGuide article which we were featured in, we share nine expert tips to help you design a stunning gallery wall that reflects your unique taste and creativity. So whether you’re selecting the perfect pieces for your rental apartment in New York, NY, or your townhome in Boston, MA, these tips will ensure your gallery wall becomes a striking and cohesive statement that enhances the beauty of your apartment. Be sure to check out Artful Arangements: 9 Expert Tips for Crafting Your Apartment’s Gallery Wall.
Article written by Ryan Castillo/Redfin with collaboration from Innovative Images and other photographers.
We suggest to our clients that they do their very best to avoid busy patterns. Here’s why. Our philosophy is that YOUR FACE, your expression is the star of your headshot. Everything else, the clothes, the background, are supporting actors. By the time your images get to LinkedIn or a casting website, they are going to be so small that it will be really important for your face to be thing that draws attention. In those situations, you don’t want want a busy, crazy shirt distracting the viewer. I would love to show you some samples of clients that have come in with the absolute wrong clothing, but I wouldn’t want to embarrass anyone! I can fix many problems, but a poor clothing choice is tough!
Busy patterns, bold colors, and wild accessories definitely have their place in business and lifestyle portraits. For your basic headshot, we recommend that you pick a classic piece in a solid color that complements your natural complexion.
If we pair that with a complementary background, we create the style and color harmony that will make your headshot, and most importantly, your FACE, stand out.
LIGHTEN UP. Avoid going too dark in your foundation shade. Have your shade professionally matched to your skin tone as close to the day of your shoot as possible. This really matters!
MATTE IS A MUST. Especially for your cheeks, stay away from shimmery powder, no exceptions. For eyelids, keep shimmer strictly to the lids.
PRIMARY FOCUS. Primer is essential for keeping makeup intact! It’s like the base coat of a nail manicure. Oil-free versions are best and also sensitive skin-friendly.
SAY NO TO SPF. Primer and foundation should be SPF-free. Formulas containing sunscreen cast a ghostlike glow with the camera flash or reflector.
LINE UP. When lining eyelids, start in the center and work your way to the outer edge. Lining the entire lid will cause the eyes to appear smaller. Use a slanted brush with a dark (but not black) shadow to line the lower lids.
MORE IS MORE. Camera lighting will wash out colors, no matter what. Don’t be scared off by a dramatic finished look. It won’t photograph that way unless you have gone overboard. Your makeup should be a bit more intense than your every day look. Please avoid too much eyebrow pencil but do fill in your brows for a natural look. Eyebrows frame your face so a delicate balance it absolutely critical.
BLEND, BLEND, BLEND. When it comes to concealer, cheek contouring and eye shadow, a quality set of brushes is key. The camera will highlight and pick up on unblended edges, creating a clow-like look. Unblended concealer will highlight fine lines.
MELLOW YELLOW. To set makeup, choose a yellow based powder rather than a translucent powder Much like SPF formulas, translucent powders cast a white glow when photographed.
AU NATURALE. Always have makeup applied in a natural light. This will be the best indicator of how it will look when photographed. Please wear a little make up even if you do not normally do so because a totally natural look can really make you look washed out in photos. We love natural looks, but a little lip color, cheek color, brow pencil, and mascara will go a LONG way!
10. SAY NO TO SPIDER LASHES. The worst mistake that people make is wearing long, fake, thick eyelashes. Your eyes will disappear in the shadows of the spider like lashes. If you are dead set about falsies, keep them shorter and less thick than normal. I promise you..eyelashes can ruin portraits and no amount of retouching can repair the damage. I wish I could post some of my clients who have made this tragic mistake but I wouldn’t want to embarrass anyone. Too much mascara can have the same negative effect. Mascara is great but do not apply it over and over making the lashes stick together and look clumpy.
11. USE COLOR HARMONY. Think about what you are wearing and select lip and cheek colors that blend with your clothing. A complementary nail color is essential too. For example, if you wear pink, do not use coral shades for lips, nails, etc. If you are someone who doesn’t like pink on your lips, you should avoid pink clothing too. It’s probably not your best look!
11. PRACTICE RUN. Don’t let the day of your photo shoot be the first time to try new products. Trial runs are essential to creating the perfect final look!
Senior photo shoots at Innovative Images start with a decision regarding what type of session a person desires. We base our sessions on how much time and travel needed to achieve a client’s goals. We offer a 1 1/2 hour session which normally allows for three clothing changes and no locations other than our studio setting which includes indoor and outdoor areas. The session fee is $100. and must be paid in advance to schedule a date/time. We also offer a 2 hour session which allows for another clothing change and a location within a few miles of our studio, if desired. This session fee is $150. Our final offering is a 2 1/2 hour session which includes 4-6 clothing changes, studio areas and locations. See the link at the bottom of this posting for online booking.
During the session, Kurt will help determine what a client should wear and the best background for the outfit. We do have a dressing room where clients can place their clothing and freshen up between changes. If multiple clothing options are being used on location, we find a place to change or use our vehicles. It always works out! Kurt does all sorts of poses in each clothing choice allowing for lots of creativity and options. He will do close ups, full length, smiling, serious looks, etc. Clients love the way he takes charge and helps them look their very best.
Depending upon the session, you will see between 50-100 images at the order appointment which is typically 2-3 days after the session. Prior to arrival at the order appointment, Kurt will review the pics and narrow the choices down to the best ones so clients will not be overwhelmed. He will delete those in which eyes are closed, etc. In addition, Kurt picks his very favorite images and does a little retouching so clients can see what the end results will be.
Check out these photos of a Super Safari session done in February, 2024. You would never guess it was in the middle of winter! Part of this photoshoot was at Adriatica Village in McKinney and the others were done at our home studio.
Back in the 70’s and 80’s, almost every professional family photo was taken indoors. Popular portrait studios like Olan Mills and JC Penney had a corner on the market. There were many individually owned brick and mortar photo studios too. At that time, the photographer had to have an understanding of lighting and posing in order to be successful. Many photographers had their own darkroom for film processing. Retouching was possible, but it was a process! Most of the time, the photographer would send his/her film to a professional lab for retouching specifics. It was a lengthy process but the results could be absolutely stunning when it was done correctly.
We opened Innovative Images in 1992. We did all of the things detailed above, but we were young and open to change. We started using Photoshop from the very beginning and it was definitely rogue. We remember the very first time we saw a digital camera at a professional conference. It was incredibly expensive and the results were VERY POOR. We knew the digital technology wasn’t up to our standards, but we watched as things progressed rather rapidly. We ended up buying our first digital camera a few years later and used it specifically for business headshots because the images were not good unless they were very small. In 1998, we rented a very expensive digital camera to use for a family portrait session of a high profile celebrity. The client ended up ordering beautiful, large wall portraits from indoor images we created and our journey into digital photography was off and running.
Never could we have imagined the introduction of the cell phone camera. This invention allowed everyone to have a digital camera on them all the time. Many people decided they no longer needed professional photographers or printed photos. Family photos shifted to almost exclusively outdoor settings and the lines of what constituted a professional photographer became blurred. Today, digital cameras are everywhere and many “pros” actually use a cell phone during their sessions. Believe us when we say that there is a difference in the output of digital cameras but mostly the difference in high quality work is still the result of a high degree of understanding in lighting, posing, and retouching.
Our goal is to provide a true professional experience and unbelievable results. We are always learning and growing within the profession and we hope to continue creating gorgeous, meaningful family photography no matter what changes in the world of photography occur. While we love outdoor family portrait sessions, we do offer indoor sessions and the results can be stunning and dramatic when done right. In fact, there seems to be a resurgence of good, quality indoor photography reminiscent of what was produced 50 years ago but better. In addition, clients are loving beautifully done printed, tangible portraits instead of bunch of digital images that get lost and unappreciated. More on that in a future blog post!
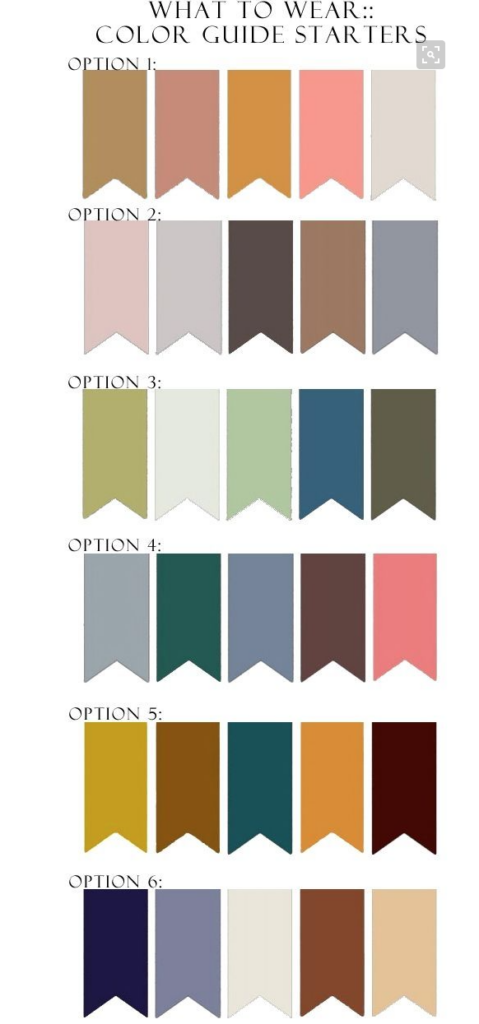
In the old days, photographers might have told a family to wear something like all white and denim or all black. Easy, YES, but good, NO! Seriously, how many families go around looking like clones? We want your family portrait to be a natural look but there are things to consider. Here are some do’s and don’ts!
*DO these things:
1.Come up with a plan for the portrait session. Do not allow each person to just show up in their favorite clothing. Color harmony and mood is important.
2. Wear colors that would look like a great accent in your home. In other words, if you decorate in gray and blue, don’t wear colors such as red, hot pink, burgundy, etc. Stick with neutral tones that will blend with your home’s decor.
3. Wear clothes that somewhat match each personality yet blend with the family. Solid colors mixed with very small prints containing the solid color choice and jackets, vests, etc. are usually a nice look.
4. Wear layers, jewelry, etc. to highlight each person’s unique style.
5. Women should wear a little make up! You can look sick and pale with nothing to highlight your face! I know you want to look natural, but a little makeup is a great thing.
6. Wear a variety of textures.
7. Wear colors that go with the natural background of the season. (Ex: Do not wear springlike colors in a fall landscape)
2. Wear WHITE especially if you’re the only one! You’ll be too bright and overpowering.
3. Wear short sleeves if you are even a pound overweight. Trust me on this one. We can help the situation in the retouching process but help me by not doing it and help yourself because your arms will look bigger than you think.
Wear socks that will show such as little white athletic socks!
Wear a mix of light and dark colors. Choose either light or either dark or all neutrals on top. PLEASE AVOID SHIRTS LIKE NAVY AND WHITE STRIPES, ETC. This is an absolute killer.
Use this chart to help you come up with a color scheme!
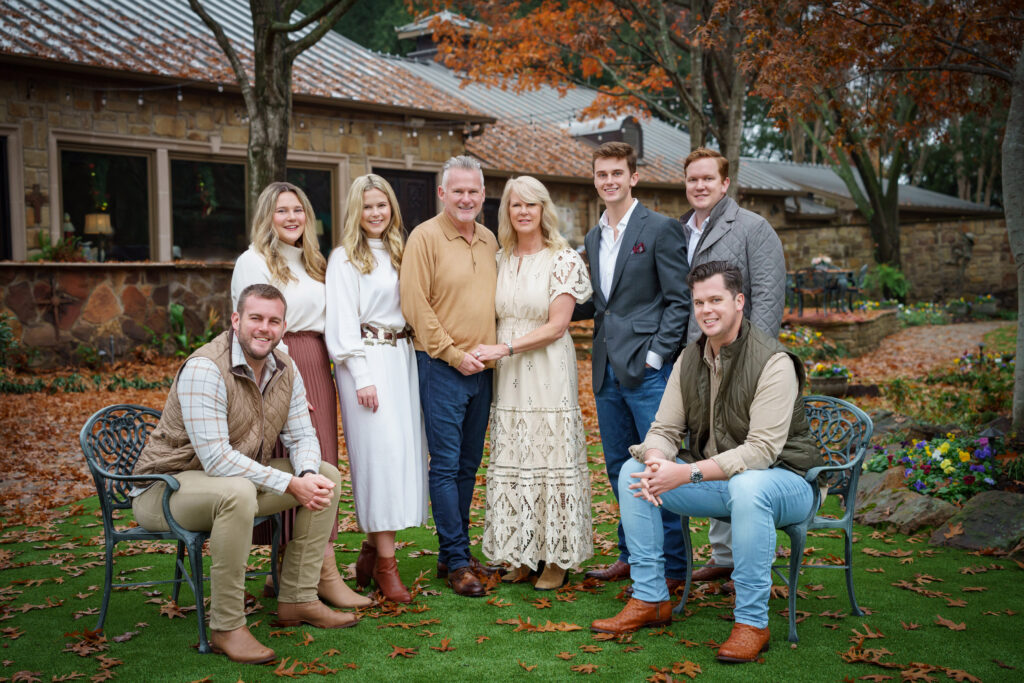
This family did a beautiful job of mixing textures (sweaters, lace, quilted vests, jacket, etc.) In addition, they look perfect in the fall background. There are at least 3 people in off white which is good because if there were only 1, that person would have been the focus of the group. Everyone has on a NEUTRAL color scheme that is similar to option 6 above. They go together but each has their own look! What a gorgeous family portrait!
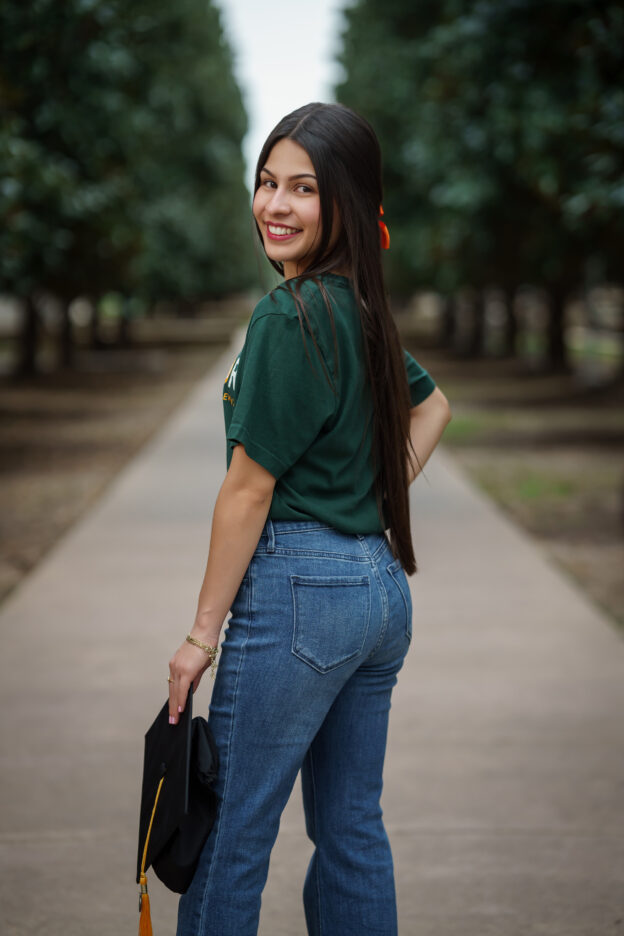
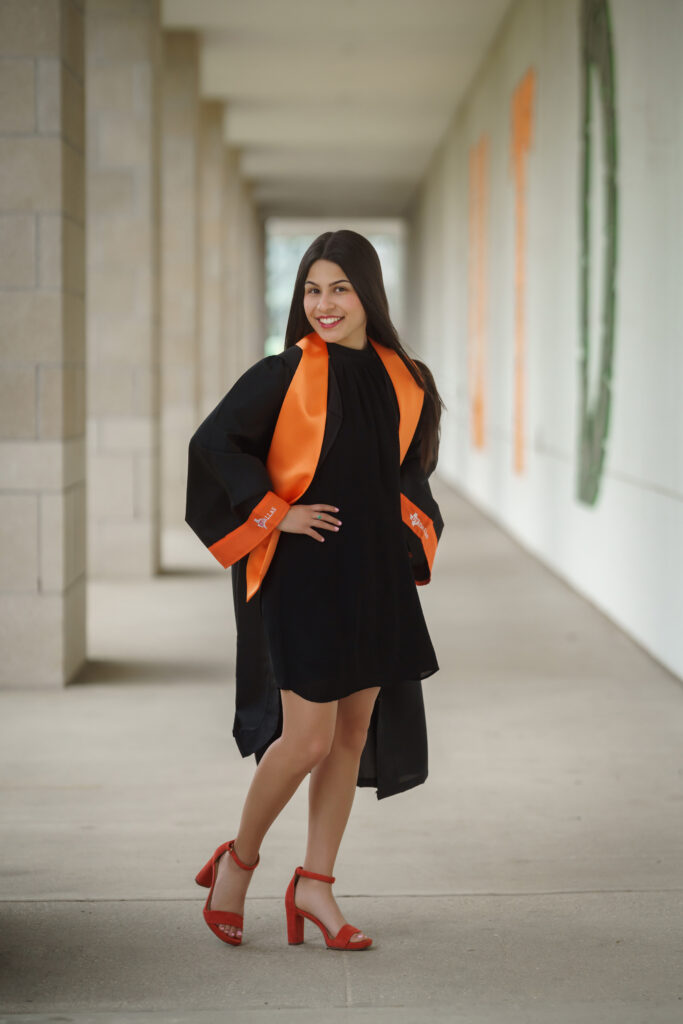
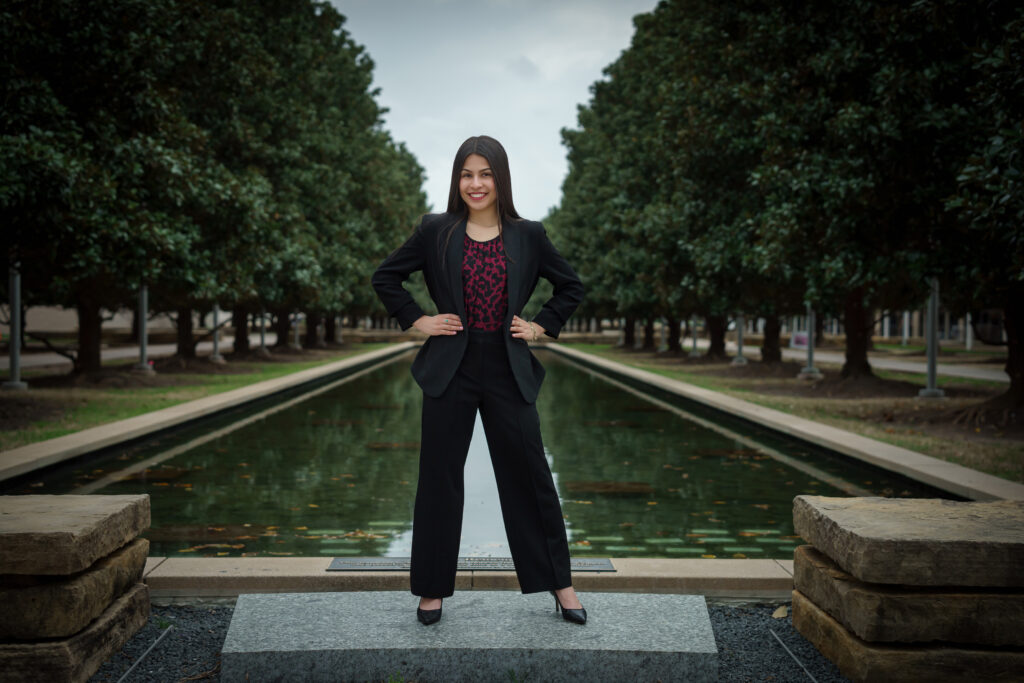
Most people used to consider a full on senior portrait session as something specific to high school seniors. That is no longer the norm! College seniors are celebrating their accomplishments with senior portrait sessions on their respective campuses. We know that college shapes lives in very profound ways therefore recording graduation with professional portraits is a special way to remember this amazing time of life.
Each spring we schedule local college seniors at schools such as North Texas, SMU, TCU, Austin College, University of Oklahoma, UTD, etc. Call us for more details!
Here are a few of our favs from Emily’s session on the campus of the University of Texas Dallas.